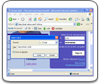
Main Window
To open the main window of Handy Password, double-click the tray icon of Handy Password or open it through the Windows Start menu: Start menu -> Programs -> Handy Password. Here is what Handy Password main window looks like:

The main window contains:
Top Menu
There are four tabs on the top menu: File, Card, Service, Help File.
File Menu
File menu contains the following items:

The top four items of the list: Create Database, Open Database, Save Database, Delete Database all deal with the database management. To see what actions you can perform with Handy Password database, see Managing Database.
- Change Master Password – Master Password is needed for security of your personal information. Click the item if you want to change it. For details, refer to Master Password section of the manual.
- Print cards – allows you to print your personal information. For more details, see Print Cards.
- Close – exit application.
Cards Menu
Cards menu contains the following items:

- New Card… - select this item to create a new data card. For more information, read Creating new cards.
- New Folder… - select this item to create a new folder. For more information, read Folders.
- Find… - select this item to find information in Handy Password database. For more information, refer to Find Dialog.
Service Menu
The following functions can be found in the Service menu:

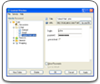
- Settings... - opening Handy Password Settings window. To see more, go to The Settings page;
- Personal Info... - filling in your personal information such as names, addresses, credit card data and so on. It may be used later for automatic filling of web-forms. For details, see Personal Info;
- Autosubmit - turning on/off the Autosubmit function. If marked, pressing "Fill" ends up with automatic submit;
- Password Generator... - launching the built-in password generator. To learn more, please follow the link The Password Generator;
- Language - altering the interface language (English, French, German, Spanish).
Help Menu
Here is what Help menu looks like:

- View Online Help - opens Handy Password online help;
- Visit Home Page – opens Handy Password home page;
- Request for Support... – opens Support page. There you can find how to contact the support service and submit a feedback form with your questions and/or comments;
- Getting Started - opening a new browser window with basic information on how to start using Handy Password;
- How to Register... - clicking this menu item will open the Handy Password registration page where you can purchase Handy Password;
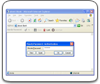
- Enter Serial Number... – opens the registration dialog where you can enter your serial number which you receive upon purchasing Handy Password;
- Register your email box… – this function allows you to download Handy Password database from the email server and use Handy Password even if your database exceeds 15 cards and the trial period of the local Handy Password version has expired. For more information on using database stored on the email server, refer here
- About Handy Password... - information about program: version number, release date, producer and registration data;
Card Managing Toolbar
The card managing toolbar allows you to manage cards with your personal information.

 - creating a new card, blank or of predefined structure, for example, medical prescription. To learn more about it, please, visit Creating new cards.
 - creating of folder for cards grouping. To learn more about it, please, visit Folders;
 - deleting of card or folder, which is pointed by the cursor.
 - showing the window for searching cards by title, fields and URL keywords. To learn more about it, please, visit Find Dialog;
 - executing the printing cards dialogue. To learn more about it, please, visit Managing cards;
 – saves the database to the mailbox. For more information on saving database to the mailbox;
 – opens the database from the mailbox. For more information on opening database from the mailbox;
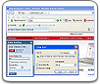
 - launching an Internet Explorer/Mozilla Firefox window with URL written in the marked card. The web-form is filled in according to the card content and submitted if Autosubmit is turned on. For details, please, see Filling;
Use by default - if marked and the web-form has more than one card, namely this card will be used when the Fill button is pressed;
Show on toolbar - switching it on, you place a bookmark for this card in Handy Password browser toolbar in Internet Explorer/Mozilla Firefox.

Card Explorer
Card Explorer shows folders and cards tree. Here you can create, rename, and delete cards and folders. You can move cards between folders by Drag&Drop function. To learn more about managing folders and cards please visit Folders and Managing cards.
Card Editing Toolbar

This toolbar has following buttons:
 - adding one or several fields to the "Additional information" section of the chosen card. By default a text field is added. For choosing another format you need to click the right part of the button. Please, go Managing cards for details.
- - confirmed deleting of a selected card field from "Addition information" section.
 - Toggle password displaying: display or hide password.
Card Editor
When you click a card in the Card Explorer, its content is displayed in the Card Editor window, to the right. Here you can change fields content of the card. To learn more about editing cards please visit Managing cards.
How to Manage Your Passwords Through IE Toolbar
 |  |  |